Wednesday, October 29, 2014

October ProjectPea Blog Hop

Welcome to SugarPea Designs October ProjectPea Blog Hop
Each month we challenge our fabulous team of ProjectPea Designers to create FUN &  CREATIVE projects that are sure to make you look at your stamp sets with brand new eyes!

I discovered this adorable little treat box
made with the Envelope Punch Board from We R Memory Keepers. You can find the tutorial that inspired me HERE.  I made it three ways using three stamp sets. 
How cute would this be at each place setting Thanksgiving dinner?
I used Bountiful Blessings on my tag.
When I assembled this box. I angled it a bit then adhered the tabs to each other not the inside flaps.
Need a little Trick Or Treat?
Stamping the zombie from Undying Love adds just the right spooky touch to my treat box. 
This box I adhered it straight then left all the flaps down to use as an open box. 
I wanted to also create an everyday example too. 
I used one of my favorite SPD sets  Bushel & A Peck
I made this box the traditional way adhering all the side tabs together.
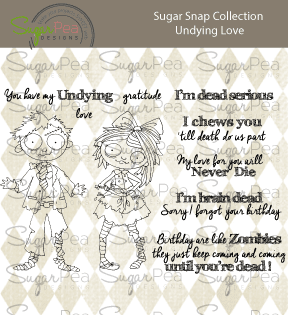
Undying Love
Undying Love

Bushel & A Peck
Bushel & A Peck
Supplies:
Stamps:Undying Love, Bushel & A Peck, Bountiful Blessings (SugarPea Designs)  Paper: Hisbiscus Burst, Kraft, True Black (Papertrey Ink), Recollections White 110# (Michaels), Friendly Forest, Ghouls & Goodies (Doodlebug Design), Summer Bliss (Echo Park) Ink:VersaMark, Versafine Onyx Black Accessories:White Embossing Powder, heat Tool, Dimensionals, Anti-static embossing pouch Techniques:Envelope Punch Treat Box

The ProjectPeas have pulled out all of the stops with a variety of projects that will spark YOUR creativity. 

Click through to each of their blogs below to see the FUN they have dreamed up. Leave them a little blog love and one lucky commenter will WIN a $15 Gift Certificate to the SPD Boutique.

Monday, October 27, 2014

TI Black Cat Trick Or Treat

Time for a new challenge up at Tiddly Inks
 Make a Halloween card using any black color combo or Cat
Come play with us for a chance to win free Tiddlys
I went with orange and black color combo and I have a cat too
I'm using Trick or Treat Wryns.  I cut her out from the trio image.   I first placed my newsprint washi tape along the left edge then added an 1/8" border of black.  Next I drew my line and colored around the image with greys.
 Then I used post-it notes to protect what I did not want sponged
and I sponged Distress Ink just around Wryn for a warm glow. Then I popped her up and added a sentiement from A Jillian Vance Design from a set called {die}verse Halloween Tags
Can you see my twine on the pumpkin trick or treat bucket?
I cut off the outline handle, punched two 1/16" holes and threaded twine through them and knotted the ends. 
Here's The Inside
I added washi tape, twine and sequins to tie in the front of the card to the inside.
 
I am also playing in this week's Less Is More
I used newsprint washi tape for my side border.
I am also playing in this week's
 
 
Supplies
Stamps: Trick or Treat Wryns (Tiddly Inks), {die}verse Halloween Tags Stamp And Die Combo (A Jillian Vance Design)  Paper:  Recollections White 110# (Michaels), Neenah Solar White 80#, True Black (Papertrey Ink)  Ink: Printer, Tim Holtz Spiced Marmalade Distress Ink, Copics: E000, E00, E11, R20, YR02, YR04, YR07, YR09, C1, C3, N4, N0 Accessories:  Halloween Twine (Target Dollar Spot), Washi Tape (American Crafts), Clear sequins (Pretty Pink Posh), Tim Holtz Blender Tool  Techniques: Sponging
Trick Or Treat Wryns
Trick or Treat Wryns
 
{die}verse Halloween Tags Stamp And Die Combo
Thank you for visiting. Enjoy your day.

SPDSS14 Gotcha Covered

 It's time for a new SugarSketch at SugarPea Designs. 

I used the sweet set Hello, Sunshine
I made a shaker card.  I bought some Martha Stewart Washi tape from JoAnns recently and today I put it to use.

Supplies
Stamps: Hello, Sunshine (SugarPea Designs)  Paper:  Acetate, Recollections White 110# (Michaels), Neenah Solar White 80#, Ink: Classic Kraft Dye Ink (Papertrey Ink), Memento Tuxedo Black, Copics: R20, R22, R43, R24, R29, C1, C5, N0, N4, YR23, Y17, Y21, BG000, BG01, B00, B04 Accessories: Washi Tape (Martha Stewart), Clear Sequins (Pretty Pink Posh), Scotch Dimensional Tape, Score Tape , Cuttlebug, Spellbinders rectangle dies  Technique: Shaker Card


Play along with any stamp you like - but if you use SugarPea Designs, we'll top your voucher up to $15!
Feel free to rotate/flip the sketch, or exchange any shapes for what works with your design, just make sure the sketch is recognizable!
Combine our sketch with any other challenge(s) (except another sketch!)
Upload to your blog or other online gallery using keyword: SPDSS14 so that we may check out your beautiful work
Add your link to the linkup on the SugarPea Blog. You'll find our current challenges on the sidebar.


Hello, Sunshine
Hello, Sunshine
 

AJVD Happy Halloween Jack

 Time for a Halloween card. 
 I'm playing in today's Clean And Simple Challenge - Halloween at Splitcoaststampers.
I was inspired by my friend Colleen Dietrich's Damask Pumpkin Tutorial HERE.   I did use dimensionals under the front oval, the next two, then on the back to give lots of dimensional on my pumpkin.  I sponged him first with Spiced Marmalade Distress Ink then Black Soot.  Using black like Colleen did gives him that Halloween feel.

This card is also for this week's Simon Stays Stamp Wednesday Challenge
I crinkled up a small scrap of Kraft to make my stem.


I used two A Jillian Vance Design stamp sets. 
 I used the Jack face from {die}verse Halloween Tags  and the sentiment is from Happy {OWL}oween
Here's the inside.
I put a strip of washi tape along the bottom and finished off with clear sequins. 

Supplies
Stamps: {die}verse Halloween, Happy {OWL}oween (A Jillian Vance Design)  Paper: Recollections White 110# (Michaels), Classic Kraft (Papertrey Ink), Friendly Forest (Doodlebug Design) Ink: Versafine Onyx Black, Memento Tuxedo Black, Accessories:  Washi Tape (American Craft), Clear Sequins (Pretty Pink Posh), Twine (Target Dollar Spot), SU oval punch, Scotch dimensional tape, Cuttlebug, CB Distressed Stripes Embossing Folder  Technique: Dry Embossing
{die}verse Halloween Tags

Happy {OWL}oween
Happy {OWL}oween
Thank You for visiting. Enjoy your day. 

Saturday, October 25, 2014

You Old Goat

I am playing in a couple challenges today using SugarPea Designs. 
First, congratulations to my very talented friend Annette Allen aka Clever creations
 She is today's Featured Stamper at Splitcoaststampers.  I used this fun set from SugarPea Designs, Totes Ma Goats.  I cased THIS BEAUTY by Annette. 
My Changes
washi tape border
kraft fence
marker grass
image

I am also playing with Freshly Made Sketches #159.
I love this sketch with all its breathing room.  I flipped the sketch upside down.  I used washi tape for my border on the inside and outside that I placed my top white panel on top of.  Love this woodgrain washi tape from My Minds Eye.
Lastly, I'm playing in this weeks Simon Says Stamp Wednesday Challenge - 
I used kraft cardstock to make my fence.

 
I used Copic markers to make my grass like Annette did on hers, but I extended mine to the card edges. 
Here's a close up.
I dry embossed my fence.
 

The inside.
I stamped two kids on the inside by masking the front off and stamping the other behind.  And added this punny sentiment.
 
Supplies
Stamps:  Totes Ma Goats (SugarPea Designs)  Paper:Kraft (Papertrey Ink),   Recollections White 110#, Neenah 80#  Ink:  Memento Tuxedo Black, Copics: YG21, YG23, YG25, C1, C3, N4, E31, E33, E35, R22, Accessories: Washi Tape (My Minds Eye), Scotch Dimensional Tape, Cuttlebug, CB Embossing Folder Distressed Stripes Technique: Dry Embossing
 

Totes Ma Goats
Totes Ma Goats
Thank you for visiting.  Enjoy your day.

Thursday, October 23, 2014

TI Fab Fri - NEW Wryn

Are you ready for Tiddly Inks Fab Friday?
Its and entire post of inspiration from the Tiddly Inkers HERE
 You know what else?
There are two new images in the store today.  I am using the new Wryn's Leaves.  Isn't she the cutest with her puppy pal? 
 I printed her up twice and computer generated my sentiment. 
Using Tim Holtz Distress Ink I sponged my edges then cut her out from another paper, colored her up, put glossy accents on the leaves (you can't see in the pic) and popped her up.  I noticed by cutting around the leaves it seems like it gives the leaves motion. 
Here's a closer view although you cannot see the glossy accents on the leaves. 
Here's the inside.
I printed her in yellow then adhered to the inside. 

Supplies
Stamps:  Wryn's Leaves (Tiddly Inks)  Paper:  Neenah Solar White 80#, Recollections White 110# (Michaels)  Ink:  Printer, Copics: YR23, Y17, Y21, E000, E00, E11, R20, R22, R43, C1, C3, N4, 0, BG000, E79, Tim Holtz Distress Ink Peacock Feathers, Vintage Photo, Walnut Stain  Accessories:  Tim Holtz Mini Blender tool,  Glossy Accents (Inkessentials), Scotch Foam Tape  Technique:  Sponging


Wryn's Leaves
Wryn's Leaves

Thanks for visiting. Enjoy your day. 

01 09 10