Showing posts with label SeaSide Wishes. Show all posts

Friday, July 10, 2015

SPDSS28 - You're Sun-sational

Are you playing to win ?

The latest SugarPea Designs SugarSketch is up HERE.
Come play for a chance to win an SPD GC for goodies of your choice.
 
I first stamped my image
using Seaside Wishes and colored her up using the Simple Copic coloring method, using just one marker per color, letting it dry and going back to add shadows. I did this repeatedly til I got the look I wanted. Then I went back in with N0 for more shading.
To make the waves
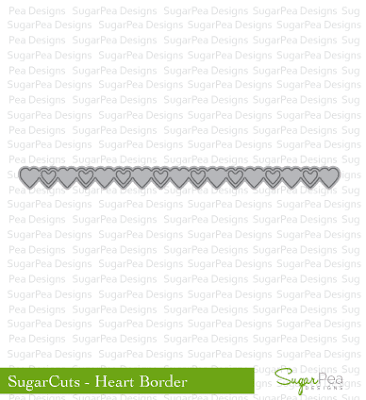
I die cute my panel using the SugarCuts Heart Border die upside down (the top of the hearts).


Supplies
Stamps: Seaside Wishes (SugarPea Designs)  Paper: Recollections White 110# (Michaels), Aqua Mist (Papertrey Ink)   Ink: Tim Holtz Distress Ink Squeezed Lemonade, Tuxedo Black (Memento), Versafine Onyx Black, Copics: Y21, YR02, V000, E000, R27, Y17, N0, 0  Accessories: SugarCuts Heart Border (SugarPea Designs), Tim Holtz Mini Blender Tool, Cuttlebug
 

Play along with any stamp you like - but if you use SugarPea Designs, we'll top your voucher up to $15!
Feel free to rotate/flip the sketch, or exchange any shapes for what works with your design, just make sure the sketch is recognizable!
Combine our sketch with any other challenge(s) (except another sketch!)
Upload to your blog or other online gallery using keyword: SPDSS28 so that we may check out your beautiful work
Add your link to the linkup on the SugarPea Blog. You'll find our current challenges on the sidebar.

Seaside Wishes
Seaside Wishes
SugarCuts Heart Border
So happy you visited. Enjoy your day.


Wednesday, June 24, 2015

Stamp Nation Challenge And Giveaway!

Wanna win?
SugarPea Designs is very excited today to be joining forces with StampNation and sponsoring their newest challenge…how fun is that?!?!


This is just a snippet of my card I made for Stamp Nation's Challenge.
You can see it in its entirety along with many beauties from talented Designers
HERE.

What is StampNation?
 Click HERE to find out more!
Just hop on over to StampNation to see the full challenge details and loads of inspiration using SugarPea Designs clear stamps & dies.
  Play along with StampNation's challenge and you could
WIN a $50 Gift Certificate to SugarPea Designs.

 
And Catherine has generously provided us with a prize of a 1 Month Subscription to StampNation
to give away to THREE lucky SugarPeeps!
 To win, simply comment on the SugarPea Designers blogs listed below.
 
 
Anita Madden

Vera Yates

Brianna Loeffelbein

Wendy McGaffey


Monday, April 13, 2015

SPDSS24 - You SHORE are sweet

A fresh new Sugar Sketch is up at
come play with us to win an SPD GC....
See the sketch below?
I turned it to the left, then I used a cut out image for the circle and flipped sides.  Isn't she adorable?
She is from the stamp set Seaside Wishes.


 I sponged my sand (which ended up looking like she is walking on the pier, but it still works), and my water using Distressed Inks and just the side of my straight acetate piece.
 
Play along with any stamp you like - but if you use SugarPea Designs, we'll top your voucher up to $15!
Feel free to rotate/flip the sketch, or exchange any shapes for what works with your design, just make sure the sketch is recognisable!
Combine our sketch with any other challenge(s) (except another sketch!)
Upload to your blog or other online gallery using keyword: SPDSS24 so that we may check out your beautiful work
Add your link to the linkup on the SugarPea Blog. You'll find our current challenges on the sidebar.


Click Image below to view in store~
Seaside Wishes
Seaside Wishes


Wednesday, August 27, 2014

SPD - August ProjectPea Blog Hop

 Welcome to SugarPea Designs' August ProjectPea Blog Hop
Each month we challenge our fabulous team of ProjectPea Designers to create FUN & CREATIVE projects that are sure to make you look at your stamp sets with brand new eyes!

 I made these super fun Lego match boxes using the We R Memory Keepers Envelope Punch Board (if you don't have one, it is a must have, I bought mine at Michaels) The only change I made to my boxes is I made the width of my lid 3" instead of 2 7/8. I used four different SPD stamp sets to make my tags. I filled them with Starburst Tropical by dividing up the colors.  I put 12 in each but will fit 16.  
What kid could resist this lego box of goodies?
My sentiment is from the SPD set Totes Ma Goats
Can't you see this one for Valentines Day?
This fun sentiment is from the SPD set Pizza My Heart

How about cheering someone up with this little box of sunshine?
I used the sentiment from this sweet SPD set Hello, Sunshine


What is more endearing than a pink Birthday Lego?
This beautiful font sentiment comes from the SPD set Seaside Wishes

Supplies
Stamps: Totes Ma Goats, Pizza My Heart, Hello Sunshine, Seaside Wishes (SugarPea Designs) Paper: Raspberry Fizz, Harvest Gold, Pure Poppy, Canyon Clay, Classic Kraft (Papertrey Ink), Recollections White 110# (Michaels) Ink: Versafine Onyx Black Accessories:Dimensionals (WeRMemoryKeepers), Score Tape, SU label punch, Crop a Dile 1/8" circle punch, Divine Twine Technique: Lego Match Boxes


The ProjectPeas have pulled out all of the stops with a variety of projects that will spark YOUR creativity. 
Click through to each of their blogs below to see the FUN they have dreamed up. Leave them a little blog love and one lucky commenter will WIN a $15 Gift Certificate to the SPD Boutique.


Monday, July 14, 2014

SPD Oceans Of Love

 A Brand new Sugar Sketch is up at Sugar Pea Designs. 
Come play with us using any image, you can win a $15 GC when you use a SPD image. 
You'll find more inspiration from the DT on the SPD Blog. 

 
I am also playing in Simon Says Stamp's Wednesday Challenge
 

I used the new release SeaSide Wishes
I made my card horizontal and of acetate so you can see through it.  
Here is a straight on shot so you can see the sentiment on the inside. 
 Here is another angle.  
I think acetate cards are so fun.  For my image, I cut out an oval that matches the front ova from my white cardstock and stamped my image.  Then I cut her out. colored her up and popped her onto the front. Easy peasy. 


Thanks for visiting. Enjoy your day!

01 09 10