Showing posts with label SugarCuts Layered Treat Labels. Show all posts

Friday, August 26, 2016

SPD August Release - Halloween Treat Wrappers

The SugarPea Designs August Release goes live tonight!
Have you seen the new releases all week on the SPD Blog? 
 Just go HERE to catch up, comment to win and see all the fun new goodies. 
I made Halloween Treat wrappers using the Brand new release Sweet Treats - Halloween.

I combined this fun set with SugarCuts Layered Treat Labels. 
Two label dies make up the wrapper, and the biggest circle I used to stamp on. I stamped the back of the stamp first in a color then stamped the image front in black.

They just fit right over this 3 musketeers to dress up my candy for the trick or treaters.


Here they are without they candy bar. 

I just took two labels, scored them like above.

Then folded on the square and glued the two together on the sides where they overlap.


Enjoy your day!

Monday, June 22, 2015

SPDCCC02 - Summer Pencils

Its time for this month's Color Challenge at SugarPea Designs.
I just love pencils - who could pass up these beauties from the Target $ spot?
I knew I wanted to use them for this month's color challenge.  So I put them in a jelly jar and made a tag using circles from SugarCuts Layered Treat Labels Die and  a sentiment from the new set Teddy Bear Picnic.
 
 
For the sunshine, I cut out a larger circle using a Spellbinders die.
I traced my smaller circle on it lightly then cut little triangle notches below the line all around.
Then I just used a dimensional to pop it up on the sunshine background. I got this ideal from Jennifer McGuire. If you don't follow her blog you should.

Can you see the tiny dot border?
I masked the sentiment to fit on the circle.
 
Supplies
Stamps: Teddybear Picnic (SugarPea Designs)   Paper:  DCWV Basics, Harvest Gold (Papertrey Ink), Recollections White 110# (Michaels)   Ink: Versafine Onyx Black   Accessories: SugarCuts Layered Treat Labels Die (SugarPea Designs), Cuttlebug, Scotch dimensional tape, Twine 
 
Play along with any stamp you like - but if you use SugarPea Designs, we'll top your voucher up to $15!
Combine our challenge with any other challenge(s)!
Upload to your blog or other online gallery using keyword: SPDCCC02 so that we may check out your beautiful work
Add your link to the linkup on the SugarPea Blog. You'll find our current challenges on the sidebar.

Teddybear Picnic
Teddybear Picnic
SugarCuts Layered Treat Labels Die


Monday, March 30, 2015

SPDSS23 - Happy Easter EGGS

Its SugarSketch Time at
SugarPea Designs with SugarSketch #23
 Sketches tend to scare me - I don't like clutter on my cards.
I like things clean and simple.  So to keep my card CAS and use this fun SPD sketch, I made the circle my focal image and sentiment, then kept the rest one color, in this case, white.
 
The easter eggs and sentiment are from the stamp set A Bushel & A Peck.
I masked them to stamp my pile of eggs just like I did in my flower tutorial HERE.  I used the SugarCuts Gift Tag die and SugarCuts Layered Treat Labels Die for my labels and small heart circle.
 
 
This card was also made for Lesley's
The Challenge One year Anniversary Celebration
Come play along, you could win a SugarPeas $20 GC


I am also playing in AAA Cards CAS Challenge
 
Supplies
Stamps: A Bushel & A Peck (SugarPea Designs)  Paper:  Recollections White 110# (Michaels)  Ink: Simply Chartreuse, Aqua Mist (Papertrey Ink),  Versafine Onyx Black, Tuxedo Black (Memento), Copics C1, C3, C5, 0, R20, YR02, Y21, YG21, BG000, V000, RV21  Accessories:  SugarCuts Gift Tag Die and SugarCuts Layered Treat Labels Die (SugarPea Designs), Cuttlebug, Scotch dimensional tape, Clear Sequins (Pretty Pink Posh), Tim Holtz Blender Tools, Post-Its  Techniques: Masking, Sponging
 
 
Play along with any stamp you like - but if you use SugarPea Designs, we'll top your voucher up to $15!
Feel free to rotate/flip the sketch, or exchange any shapes for what works with your design, just make sure the sketch is recognisable!
Combine our sketch with any other challenge(s) (except another sketch!)
Upload to your blog or other online gallery using keyword: SPDSS23 so that we may check out your beautiful work
Add your link to the linkup on the SugarPea Blog. You'll find our current challenges on the sidebar.


A Bushel & A Peck
A Bushel & A Peck


SugarCuts Layered Treat Labels
SugarCuts Layerd Treat Labels


SugarCuts Gift Tag
SugarCuts Gift Tag


Wednesday, February 18, 2015

SPD13 - SHAKER TAGS

Its time for a new theme challenge
 Yep, We are making Shaker's for this month's Theme Challenge.
I made shaker tags using all kinds of SugarPea Designs' Goodies. 

I cut my tag using 
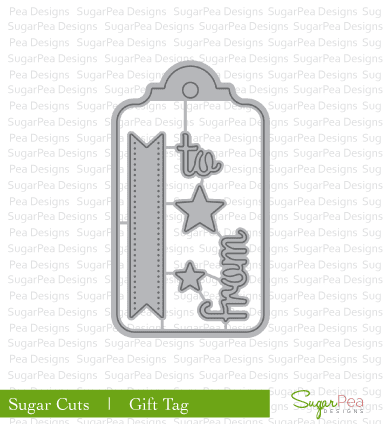
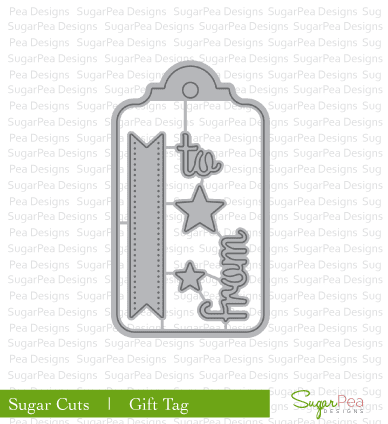
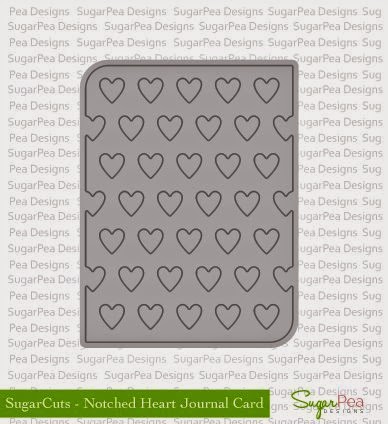
SugarCuts Gift Tag, cut out my circle for my shaker using SugarCuts Layered Treat Label, stamped my sentiment that will show through the shaker using Happy Mail and then cut out my hearts for my shaker from SugarCuts Notched Heart Journal card.

I also embossed the tags and circle for that nice finishing touch
So I learned the hard way,
that you can see the foam tape from the sides of the tag (duh right?). Well, 
I didn't think about this on my first one and it looked YUCK. So here is how I did my dimensional tape, it leaves a nice finished look.  I used half of the hearts that came out of one journal card. 

Oh and looky looky
This stamp set has a "to" and "from" so you can do the back. How cool is that!

Supplies
Stamps:  Happy Mail (SugarPea Designs)  Paper:  Recollections White 110# (Michaels), Limeade Ice, Summer Sunrise, Aqua Mist, Raspberry Fizz, Harvest Gold (Papertrey Ink)  Ink:  Versafine Onyx Black  Accessories:  SugarCuts Gift Tag Die, SugarCuts Layered Treat Labels Die, SugarCuts Notched Heart Journal Card (SugarPea Designs), Scotch Dimensional Tape, Cuttlebug, Acetate, Licorice Divine Twine  Technique: Shaker Tags 

These sweet little shakers are also for 
I know, they aren't CARDS they are TAGS, but they are SHAKERS!!!!!!!!

SugarCuts Gift Tag
SugarCuts Gift Tag

SugarCuts Layered Treat Labels
SugarCuts Layered Treat Labels 

Happy Mail
Happy Mail

Sugar Cuts Notched Heart Journal Card
SugarCuts Notched Heart Journal Card


Play along with any stamp you like - but if you use SugarPea Designs, we'll top your voucher up to $15!
Combine our challenge with any other challenge(s)!
Upload to your blog or other online gallery using keyword: SPD13 so that we may check out your beautiful work
Add your link to the linkup on the SugarPea Blog. You'll find our current challenges on the sidebar.

Thursday, January 29, 2015

SPD JANUARY Project Pea Blog Hop

Welcome to SugarPea Designs January
Project Pea Blog Hop

Each month we challenge our fabulous team of ProjectPea Designers 
to create FUN & CREATIVE projects that are sure to make you look at your stamp sets with brand new eyes!

I made an exploding Tooth Fairy Box
for the tooth fairy to leave money in exchange for that tooth.  I was inspired to make this exploding box after seeing it on Miriam's BLOG

I started with my white panel 5 5/16 x 5 51/6. 
I stamped it all over using the new 
Build A Background - Basics
This set is only available through the new Incentives Program until it releases in March. 

Place an order of $60 or more (shipping not included)
and you will receive a FREE stamp set that will not be available for sale in the store until the next bi-monthly release!  That's right! 
  You will receive a FREE stamp 2 months in advance of its release in the SugarPea Designs online shoppe 

Using the Envelope Punch I punched and scored at 1 5/8 and 3 3/4.
Next I rotated the paper and lined up on the score lines and punched and scored all around. 

I rounded all  the pointed flaps using the outside punch on the Envelope Punch Board. 
This gives it a more finished look. 

After I folded all the score lines, 
I made a score line in the little triangle in between the flaps. I scored in the center of it down to the tip of the triangle.  This will be folded in a valley fold, it takes the place of cutting and pasting to make the box. 

Now here is what the box looks like open. 

I made a belly band to hold the box together.
I cut a strip of cardstock 3/8 x 7 3/4.  I made a heart strip using the SugarCuts Heart Border Die that I adhered to my belly band.  I wrapped the band  it around the box and folded the creases as I went. 
 Here is how I extended my heart border to be the length I needed.
First I only cut up to the last 3 hearts. 
 Here you can see I did not cut all the way through at the end. 
 I lined up the die where it left off, layed my B plate
 just under that so it would cut after that area so it would connect. 
Here you can see how much I extended it beyond the die. 
Love this die. 
 Now for the topper.
I cut out two circles using SugarCuts Layered Treat Labels Die Set.  Then I stamped one with this adorable Tooth Fairy seal using the new release Fairy Sweet. I heat embossed using this fabulous ZING Flourescent Neon Pink Embossing Powder that my sweet friend Judy Rozema sent me. This is my first chance to use it. It is awesome stuff, thank you Judy.  
 I adhered the two circles with 1/8" thick of dimensional tape.
 Then adhered the whole topped to the belly band using score tape. 
 I love how that heart border looks using the metallic paper. 
I just love how it looks when it is open. 
SugarCuts Layered Treat Labels Die Set
Fairy Sweet
Fairy Sweet

SugarCuts Heart Border Die

The ProjectPeas have pulled out all of the stops with a variety of projects that will spark YOUR creativity. 
Click through to each of their blogs below to see the FUN they have dreamed up.
 Leave them a little blog love and one lucky commenter will WIN a $15 Gift Certificate to the SPD Boutique.

01 09 10